Table of Contents
- What UV Resistant Pebble Paving Actually Is
- The Benefits of UV Resistant Pebble Paving: Colour, Durability and Drainage
- Pebble Paving Maintenance Tips for Long-Term UV Protection
- Resin Bound Pebble Paving Cost: What Affects the Price
- The Permeable Paving Installation Process, Step by Step
- Slip Resistance, Load-Bearing and Safety for Families
- Repairing Surface Cracking and Patch Work on Pebble Paving
- Conclusion
- Frequently Asked Questions
Last Updated: September 10, 2026
What UV Resistant Pebble Paving Actually Is
UV resistant pebble paving is a resin-bound surface where natural aggregate is bonded with a resin that resists sunlight-driven discolouration. The resin is the critical variable: standard resins yellow and chalk under sustained UV exposure, while UV-stable formulations hold their colour for years.
Pebble Mix has over 50 years of industry experience, so we have watched plenty of early resin systems fail in the sun. The difference between a surface that still looks sharp after a decade and one that turns amber within three summers comes down to one word: aliphatic.
Why Aliphatic Resins Matter for Colour Longevity
Aliphatic resin is a UV-stable binder that resists the yellowing and chalking that destroys standard aromatic resins (PubMed). Its molecular structure lacks the light-absorbing aromatic rings that break down under sunlight.
That chemistry matters because the binder holds the whole surface together. When the resin degrades, the aggregate loosens, the colour shifts, and the finish turns dull. Aliphatic systems keep their clarity, so the aggregate’s natural tone stays visible, this is the mechanism behind non-yellowing pebble paving.
For a deeper look at how resin chemistry performs under Australian conditions, the CSIRO materials research publishes useful background on polymer weathering.
The Benefits of UV Resistant Pebble Paving: Colour, Durability and Drainage
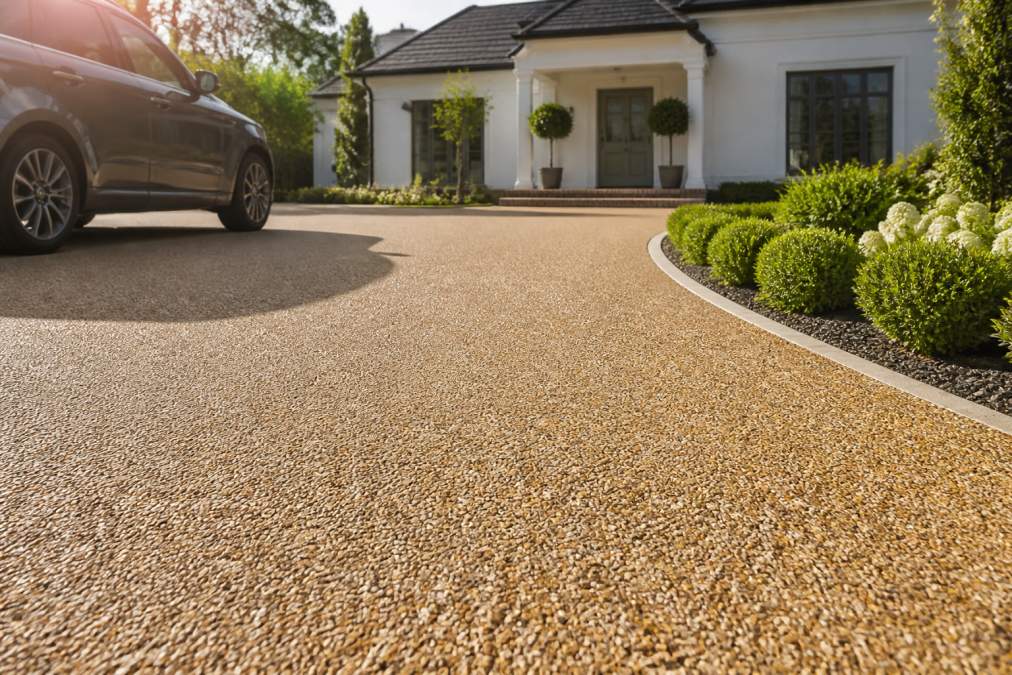
The main benefits of UV resistant pebble paving are colour retention, structural durability, and drainage capacity. A UV-stable binder protects the finish, while the open aggregate matrix lets water drain through rather than pool.
Non-Yellowing Finish and Weathering Resistance
Weathering is the slow combination of UV exposure, thermal expansion, and moisture cycling that ages any outdoor surface. A UV-stable resin absorbs the light without breaking down, so the colour stays close to its original tone.
Thermal expansion matters too. Resin-bound surfaces have some flexibility, so they move with temperature swings rather than crack. Combined with a hydrophobic binder that repels water, this keeps the surface stable across hot summers and cold winters. Frost resistance depends heavily on the sub-base, covered below.
Permeable Paving, Puddle Prevention and SUDS Compliance
Permeable paving allows water to pass through the surface into the sub-base, reducing runoff and puddling. This matters for safety and compliance.
Sustainable drainage systems, often called SUDS, are the framework many councils use to manage stormwater on private property. A porous surface helps a driveway or patio meet those expectations by slowing and filtering water on site. If your backyard pools after rain, a permeable surface can be part of the fix, though the sub-base and ground slope still need to be right.
For guidance on stormwater management expectations, YourHome’s sustainable drainage guidance is a solid starting point.
Pebble Paving Maintenance Tips for Long-Term UV Protection
Most guides stop at “sweep it and wash it.” That keeps the surface tidy but does nothing to protect the resin bond from UV degradation. A UV-stable binder is not maintenance-free, it is maintenance-tolerant. The difference between a surface that still looks sharp at year ten and one that dulls at year five is a routine that targets the binder, not just the aggregate.
Here is a maintenance schedule built around protecting the resin, not just the appearance.
A Maintenance Schedule That Protects the Resin Bond
| Interval | Task | Why it matters for UV protection |
|---|---|---|
| Weekly | Sweep or blow the surface | Removes grit that abrades the binder film and organic litter that holds moisture against the resin |
| Monthly | Hose down and inspect for dulling or chalking | Distinguishes surface dirt from genuine UV degradation early, while it is still cosmetic |
| Quarterly | Wash with a mild pH-neutral detergent and stiff broom, then rinse | Removes the film of airborne pollutants and pollen that can etch the binder over time |
| Annually | Check the sealer and reapply if the installer’s schedule calls for it | A UV-protective sealer is the sacrificial layer; once it wears through, the resin takes the full UV load |
| After any spill | Treat oil, wine, and tannin stains immediately with an absorbent agent | Stains that soak into the binder are far harder to lift than surface spills |
The annual sealer check is the step most homeowners skip, and it most directly extends UV performance. A sealer does not make the resin UV-stable, the aliphatic chemistry does that, but it adds a renewable barrier that absorbs the first hit of sunlight and weathering.
What Actually Causes Premature Dulling
Homeowners often blame UV for dulling that is really something else. Before assuming the resin has aged out, rule out these causes:
- Surface dirt and pollution film, the most common culprit, and the easiest to fix with a proper clean.
- Sealer applied too thickly, it can fill the aggregate texture and trap dirt, making the surface look flat and grey.
- Hard water and mineral deposits, these leave a chalky haze that mimics UV chalking.
- Aggregate loss, if pebbles are coming loose, the binder is failing, and that is a different problem from colour fade.
A genuine UV failure looks like a uniform amber or yellow shift across the whole surface, not patchy dulling. If the colour has shifted evenly, the resin chemistry is the cause. If it is patchy, it is almost always dirt, sealer, or water staining.
Cleaning Methods That Protect Rather Than Damage
Pressure-washing is the fastest way to strip a resin-bound surface. High pressure dislodges aggregate and scuffs the binder, and once the binder film is compromised, UV degradation accelerates at the exposed edges.
- Use a fan tip on the lowest effective setting, and keep the nozzle moving.
- Never hold the wand in one spot, and never use a zero-degree tip.
- For stubborn marks, prefer a stiff broom and a mild detergent over more pressure.
- Avoid acidic or solvent-based cleaners, which can attack the resin.
Most surface dulling is dirt, not UV damage. A proper clean often restores the finish completely, so try that before assuming the resin has aged out, and before booking a reseal you may not need.
When to Call in a Professional
Some maintenance is genuinely DIY: sweeping, washing, and prompt spill treatment. Other tasks are worth a professional eye:
- Resealing, the product and coverage rate matter, and the wrong sealer can do more harm than good.
- Persistent dulling after cleaning, this may indicate the binder is genuinely degrading and needs assessment.
- Loose aggregate across a wide area, usually a binder or sub-base issue, not a cleaning issue.
A maintenance routine is not about doing more work. It is about doing the right work at the right interval, so the UV-stable resin you paid for actually delivers its full service life.
Resin Bound Pebble Paving Cost: What Affects the Price
Resin bound pebble paving cost depends on area size, aggregate choice, site access, and sub-base condition. No single per-square-metre figure applies to every job.
The biggest cost drivers are:
- Total area, since larger jobs spread fixed setup costs across more square metres
- Aggregate size and colour, as some blends cost more to source
- Sub-base preparation, which can involve excavation, levelling, and drainage work
- Access and removal of the existing surface
Because pricing varies this much, we quote each project individually rather than publishing a flat rate. For a current figure, request a quote from Pebble Mix directly.
The Permeable Paving Installation Process, Step by Step
The permeable paving installation process follows a fixed sequence: prepare the sub-base, mix the resin and aggregate, lay and compact the surface, then allow it to cure. Cutting corners at the sub-base stage is the most common reason surfaces fail early.
Here is the sequence in order:
- Assess and excavate the existing surface to the required depth.
- Build and compact the sub-base to a stable, free-draining layer.
- Mix the resin and aggregate in the correct ratio, in small batches.
- Lay and trowel the mix to a consistent depth.
- Compact and smooth the surface for an even finish.
- Allow curing time before foot or vehicle traffic.
Sub-Base Preparation and Installation Depth
Installation depth is a specification, not a guess. Resin-bound surfaces are typically laid at around 15 to 18 millimetres over a compacted sub-base, and that sub-base depth depends on whether the surface takes foot traffic or vehicles.
Load-bearing capacity comes from the layers below, not the resin alone. A driveway needs a deeper, more heavily compacted sub-base than a garden path. Get this wrong and the surface will crack regardless of how good the resin is. Aggregate size also affects the finished texture, so the blend is matched to the use case.
Slip Resistance, Load-Bearing and Safety for Families
Resin-bound pebble paving offers good slip resistance because the exposed aggregate creates a textured, porous surface. Wet grip is one of its strongest practical advantages around pools and paths.
For families with young children or grandparents, that texture reduces the risk of a slip when wet. Castor resistance matters for wheelchair users and prams, and a properly laid surface handles both without the jolting you get on uneven pavers. The smooth finish is also wheelchair friendly when the sub-base is level.
Load-bearing performance depends on the installation, so a driveway rated for cars needs the right sub-base depth. Traffic noise reduction is a bonus: the porous surface absorbs some sound rather than reflecting it.
A slippery surface is usually an installation or cleaning problem, not a product flaw. Sealer applied too thickly can fill the texture and remove the grip. If your surface feels slick, have it inspected before adding more product.
Repairing Surface Cracking and Patch Work on Pebble Paving
Repair is the topic almost every resin-bound guide skips, yet it is one of the most common reasons homeowners search. Resin-bound surfaces are genuinely repairable, you rarely need to replace an entire driveway because of one crack. The key is diagnosing whether the fault is in the surface or the sub-base, because patching over a moving sub-base just buys a repeat failure.
Diagnosing the Crack Before You Repair
Not all cracks mean the same thing. The pattern tells you where the problem lives:
- Hairline cracks in a web pattern, usually surface shrinkage or a thin binder film. Often cosmetic and straightforward to patch.
- A single long crack running in one direction, typically a sub-base movement or a joint in the layer below. The sub-base needs attention first.
- Cracks around the edges or against a wall, often a lack of movement allowance at the perimeter.
- Loose aggregate with no visible crack, a binder failure, which may be localised or a sign of a wider mix problem.
A simple test: press on the surface either side of the crack. If it flexes or sounds hollow, the sub-base has likely moved. If it is solid, the crack is in the surface layer and a patch will hold.
Step-by-Step Patch Repair
For a surface-level crack or small damaged area, the repair follows a straightforward sequence:
- Clean the damaged area, remove all loose aggregate, dirt, and any crumbling binder. A clean, dry edge is what lets the new patch adhere.
- Check the sub-base beneath. If it has moved, compact or rebuild it before patching, or the crack will return.
- Square off the edges of the repair area where possible. A neat, vertical edge bonds better than a feathered one.
- Mix a small batch of resin and matching aggregate in the correct ratio. Match the aggregate size and colour as closely as you can.
- Fill and compact the patch level with the surrounding surface, working it into the edges.
- Allow it to cure fully before foot or vehicle traffic, typically 24 hours for foot traffic and longer for vehicles, depending on conditions.
Blending the Patch So It Disappears
The hardest part of a repair is not structural, it is making the patch invisible. A few practical points:
- Match the aggregate blend, not just the colour. Different sizes reflect light differently, and a size mismatch shows even when the colour is right.
- Feather the boundary by pressing a little loose aggregate into the wet edge of the patch so it blends into the surrounding texture.
- Repair in mild, dry conditions. Resin cures poorly in cold or damp weather, and a failed cure is a visible patch.
- Keep a small bag of the original aggregate blend from installation if you can. It is the single best way to guarantee a colour match years later.
When a Patch Is Not Enough
Some damage is beyond a spot repair:
- Widespread loose aggregate across a large area suggests a mix or binder failure, not a local fault.
- Multiple cracks from sub-base movement mean the base needs rebuilding, not patching.
- Large sunken or heaved areas point to a drainage or compaction problem underneath.
In these cases, a patch will not last and the sub-base needs to be addressed. A reputable installer will tell you this rather than sell you a patch that fails within a season.
If cracks keep returning in the same place after a repair, stop patching. The cause is almost always below the surface, and repeating the repair without fixing the sub-base is money spent twice.
Preventing Future Damage
Most repairable damage is preventable:
- Get the sub-base right at installation, it is the single biggest factor in whether a surface cracks.
- Keep edges and joints weed-free, since roots and trapped moisture can lift the surface.
- Avoid point loads such as jacks, skip bins, or heavy plant on a surface not specified for them.
- Address drainage so water does not sit against the edges of the surface.
A correctly installed, sensibly used resin-bound surface should need very little repair. When it does, a clean, well-matched patch is a permanent fix, not a stopgap.
Conclusion
Getting a UV-stable finish that still looks good a decade from now depends on the resin, the sub-base, and the maintenance routine working together, the difference between a surface that ages gracefully and one that dulls within a few summers.
Pebble Mix has over 50 years of industry experience, offering a UV-resistant, easy-to-clean product with customised colour options to suit your home. We provide professional supply and installation services, ensuring the sub-base, depth, and finish are done to spec the first time.
Get started with Pebble Mix and transform your driveway, patio, or pool surround into a durable, low-maintenance surface built to last. Call us today for a quote.
Frequently Asked Questions
How does UV resistance extend the lifespan of pebble paving?
UV-stable aliphatic resins resist the chemical breakdown that sunlight triggers in cheaper binders. Without that protection, the resin oxidises, the aggregate loosens and the surface yellows within a few years. A UV resistant pebble paving system keeps its adhesion and flexibility through seasonal thermal expansion and contraction, so the aggregate stays locked in place. That is why a properly specified surface can still look close to new after a decade, rather than needing resurfacing at the five-year mark.
Does UV resistant resin prevent yellowing in outdoor paving?
Yes, when the binder is an aliphatic resin rather than an aromatic one. Aromatic resins are cheaper but discolour quickly under direct sun. Aliphatic resins are formulated to resist that reaction, so a light-coloured or custom-tinted pebble finish holds its colour instead of drifting towards a dull amber. This non-yellowing property is the main reason UV resistant pebble paving suits pool surrounds, patios and driveways that sit in full sun for most of the day.
What maintenance is required for UV resistant pebble paving?
Routine care is simple: sweep or blow off leaves and grit, and hose the surface down every few weeks. For a deeper clean, use a stiff broom with warm soapy water, and avoid acidic or solvent-based cleaners that attack the resin. Re-seal or top up the binder only if the surface starts to look dry. Promptly blot oil or fertiliser spills, since the porous surface lets liquids soak in if they are left sitting.
Is pebble paving suitable for high-traffic driveways?
It is, provided the sub-base and installation depth match the load. A driveway carrying two family cars needs a properly compacted base and a thicker resin-bound layer than a garden path. Once specified correctly, the flexible surface handles vehicle weight, resists castor marks from bins and trolleys, and reduces traffic noise compared with plain concrete. If your driveway also slopes or drains poorly, the permeable build lets water pass through rather than pooling at the garage door.